Adding products to your NextShopz store is simple and helps you showcase what you’re selling. Follow these steps to add products to your store and start driving sales! Ready to showcase your amazing products on your NextShopz store? Follow these quick steps to add products and start selling:
1. Login to Your Dashboard: Use your custom subdomain and credentials.
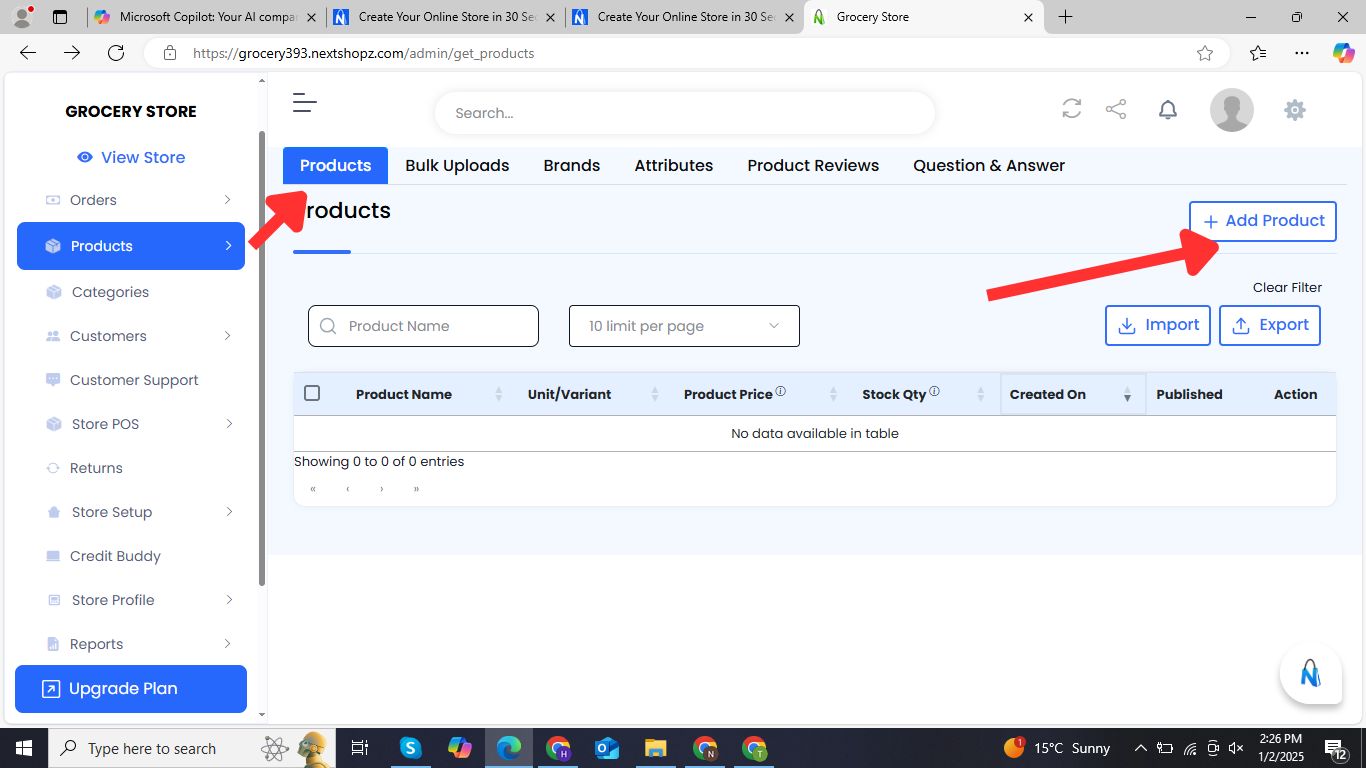
2. Go to Products Section: Click on “Add New Product.”
3. Enter Product Details: Product Name, description, category, and tags…etc.
4. Add Images: Upload high-quality product images.
5. Set Variants (If Applicable): Add size, color, and other variants.
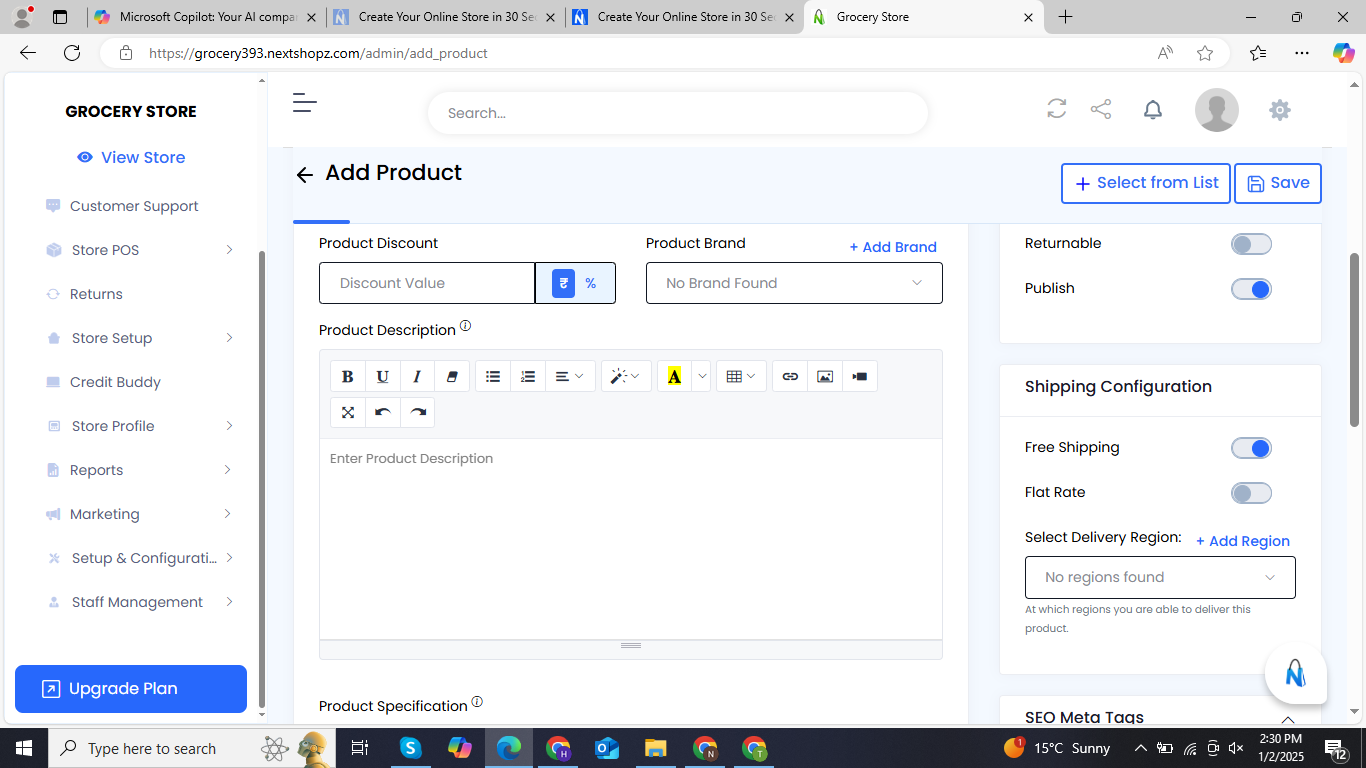
6. Set Pricing: Enter price and any discounts.

7. Add Product description and specifications
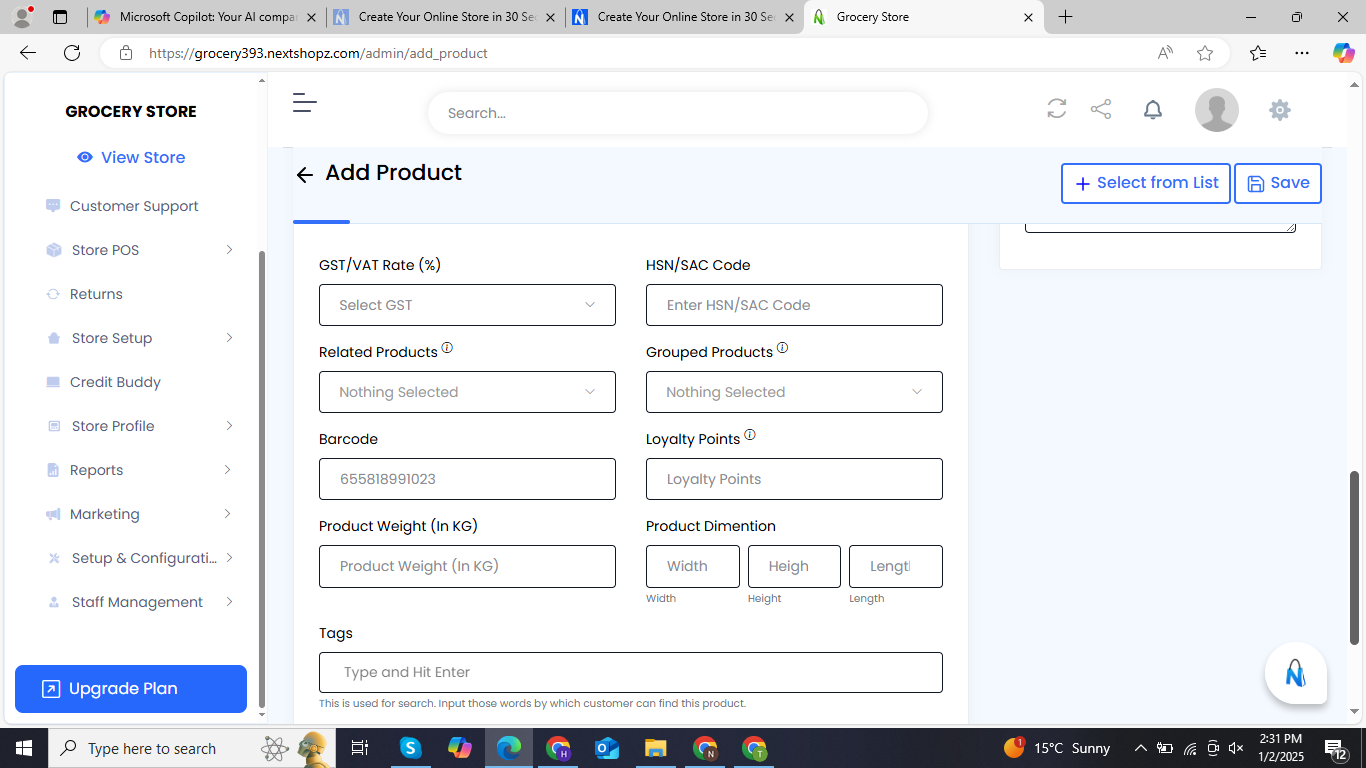
8. Add GST Related information if you have
9. Configure Inventory: Manage stock quantity and alerts.
10. Add Shipping Info: Set product weight and shipping options.
11. SEO Settings (Optional): Optimize for search engines.
12. Save Product: Make it live on your store.
This guide provides a step-by-step walkthrough on how to add products to your NextShopz store. Follow the instructions to upload product details, images, pricing, and inventory seamlessly. With this process, you can efficiently manage your product catalog and ensure your store is ready to attract and engage customers.